Claude.ai Web & desktop · custom connector
Open Claude connector settings →
Paste this URL as the MCP server URL:
https://mcp.remarkdown.org/mcp- Name the connector
remarkdown. - Paste the URL above as the MCP server URL.
- Click Add, then Connect on the connector card and sign in here when prompted.
Requires a Pro, Max, Team, or Enterprise plan.
ChatGPT Web · custom MCP app · screenshots below
Open ChatGPT connector settings →
Paste this URL as the MCP server URL:
https://mcp.remarkdown.org/mcp-
Open Settings → Connectors in ChatGPT, then click Advanced settings.
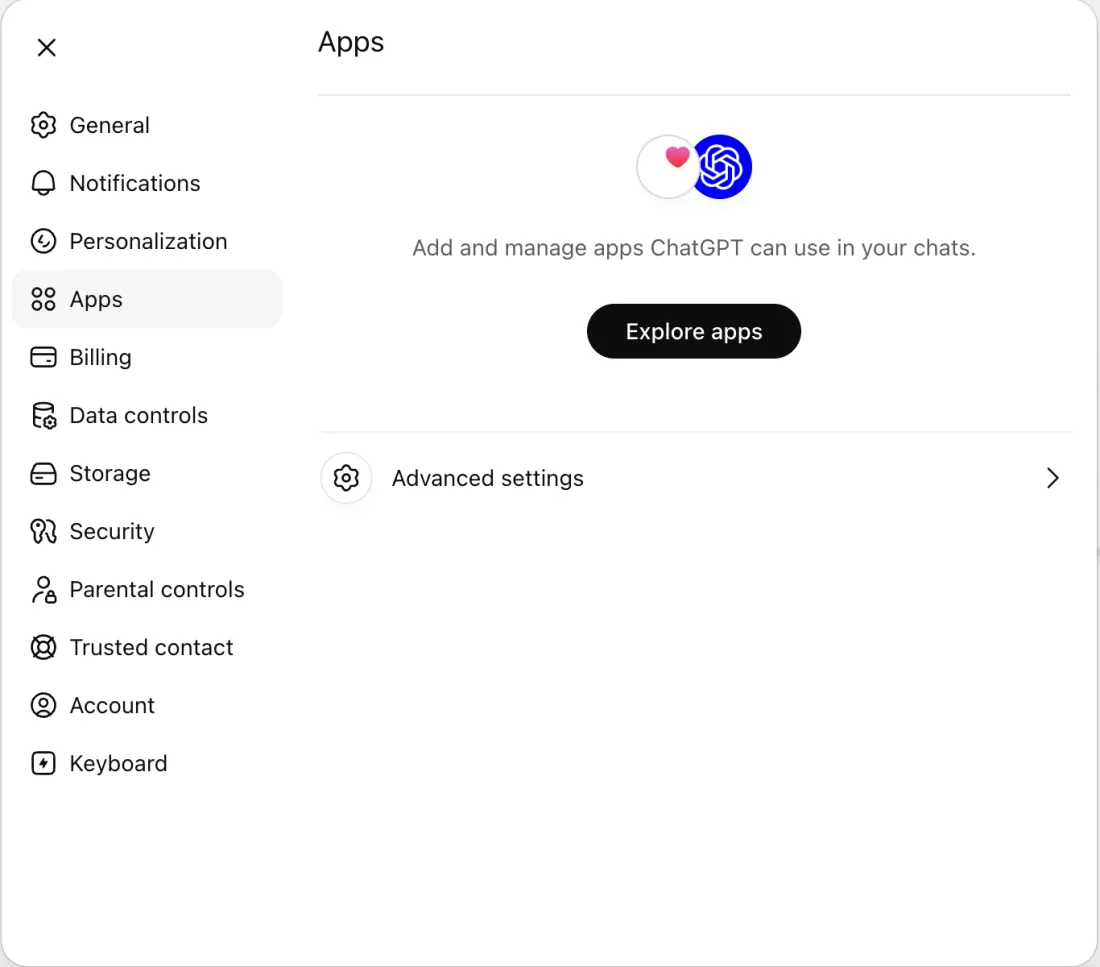
Click Advanced settings. -
Toggle Developer mode on, then click Create app at the top.
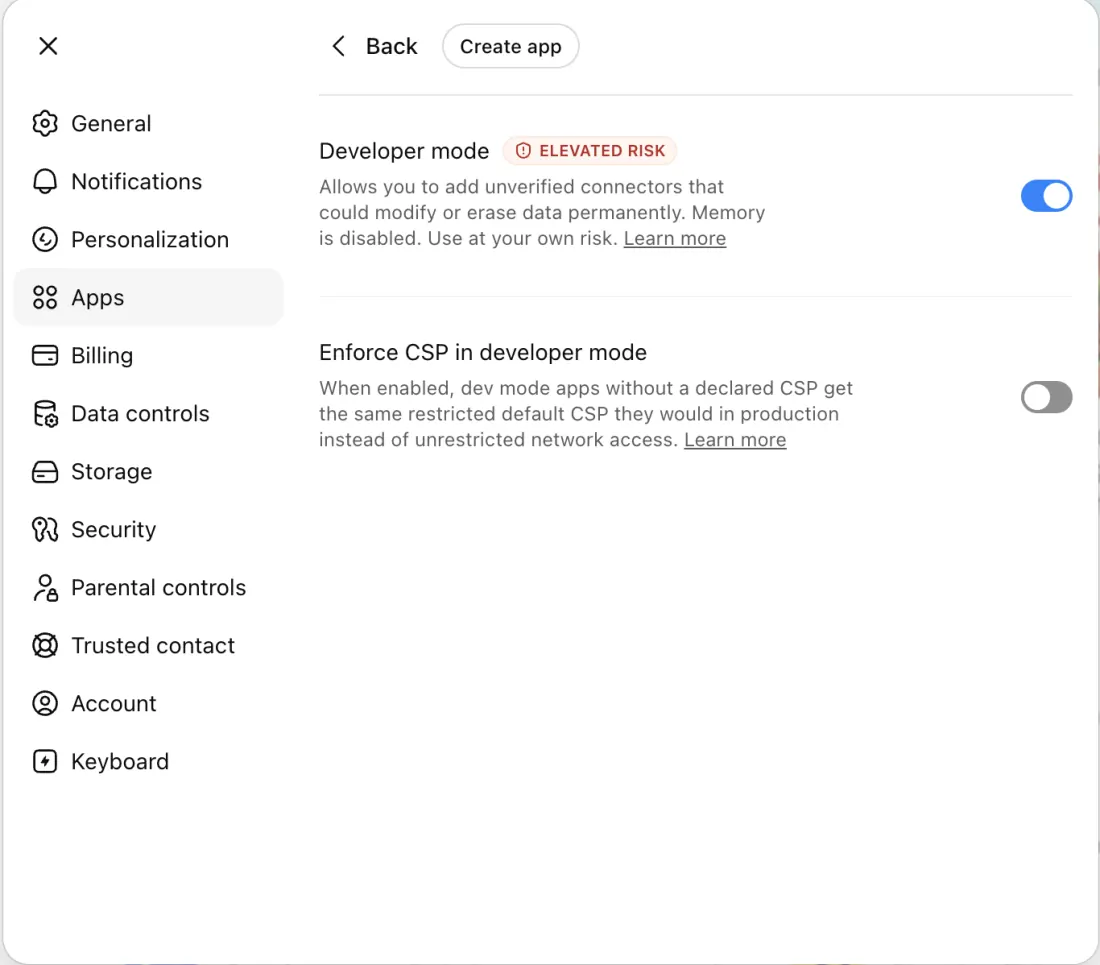
Activate Developer mode, then Create app. -
Fill the form, check the consent box, and press Create:
- Name:
remarkdown - Description:
Search and send documents to your reMarkable device. - MCP Server URL: paste the URL above.
- Authentication: OAuth.
- Check I understand and want to continue.
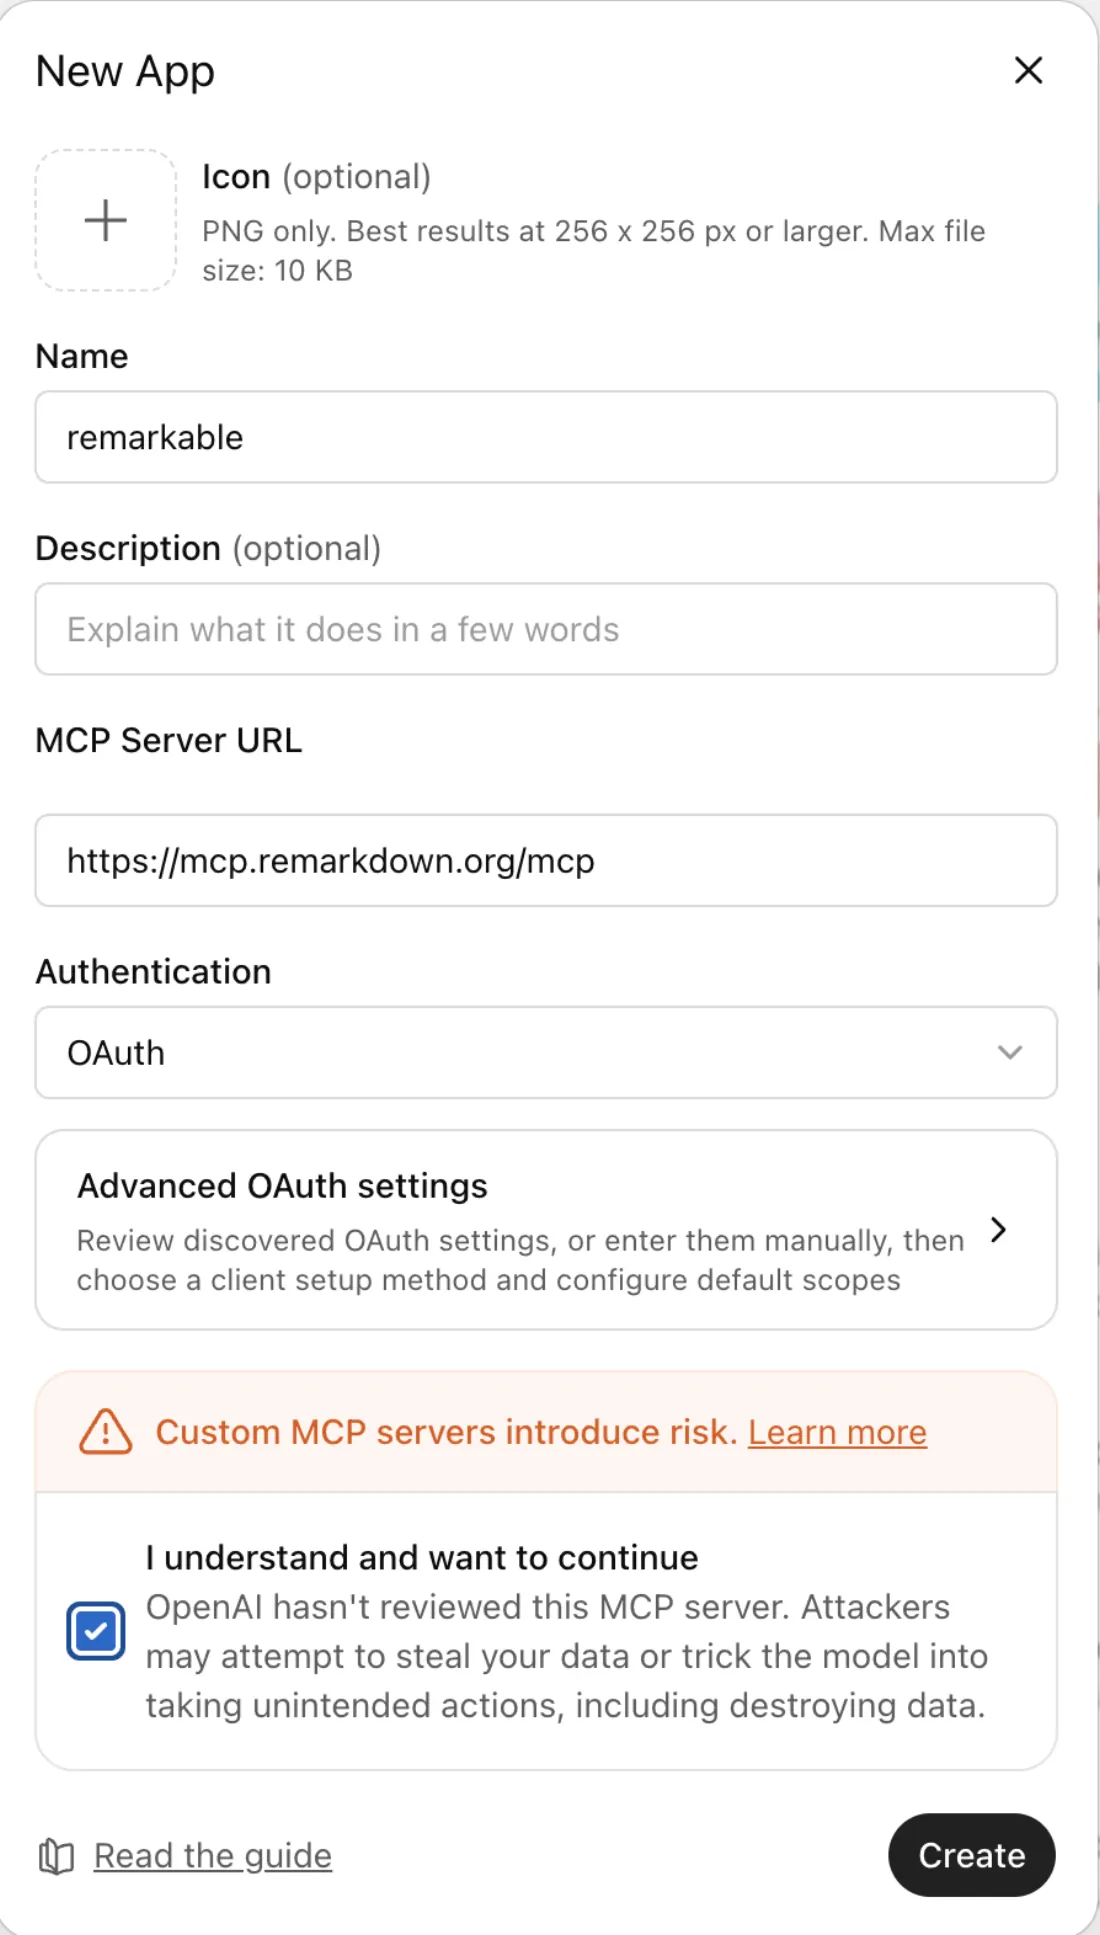
Filled form, consent box checked, then Create. - Name:
-
ChatGPT takes you to an authorization screen — click Authorize.
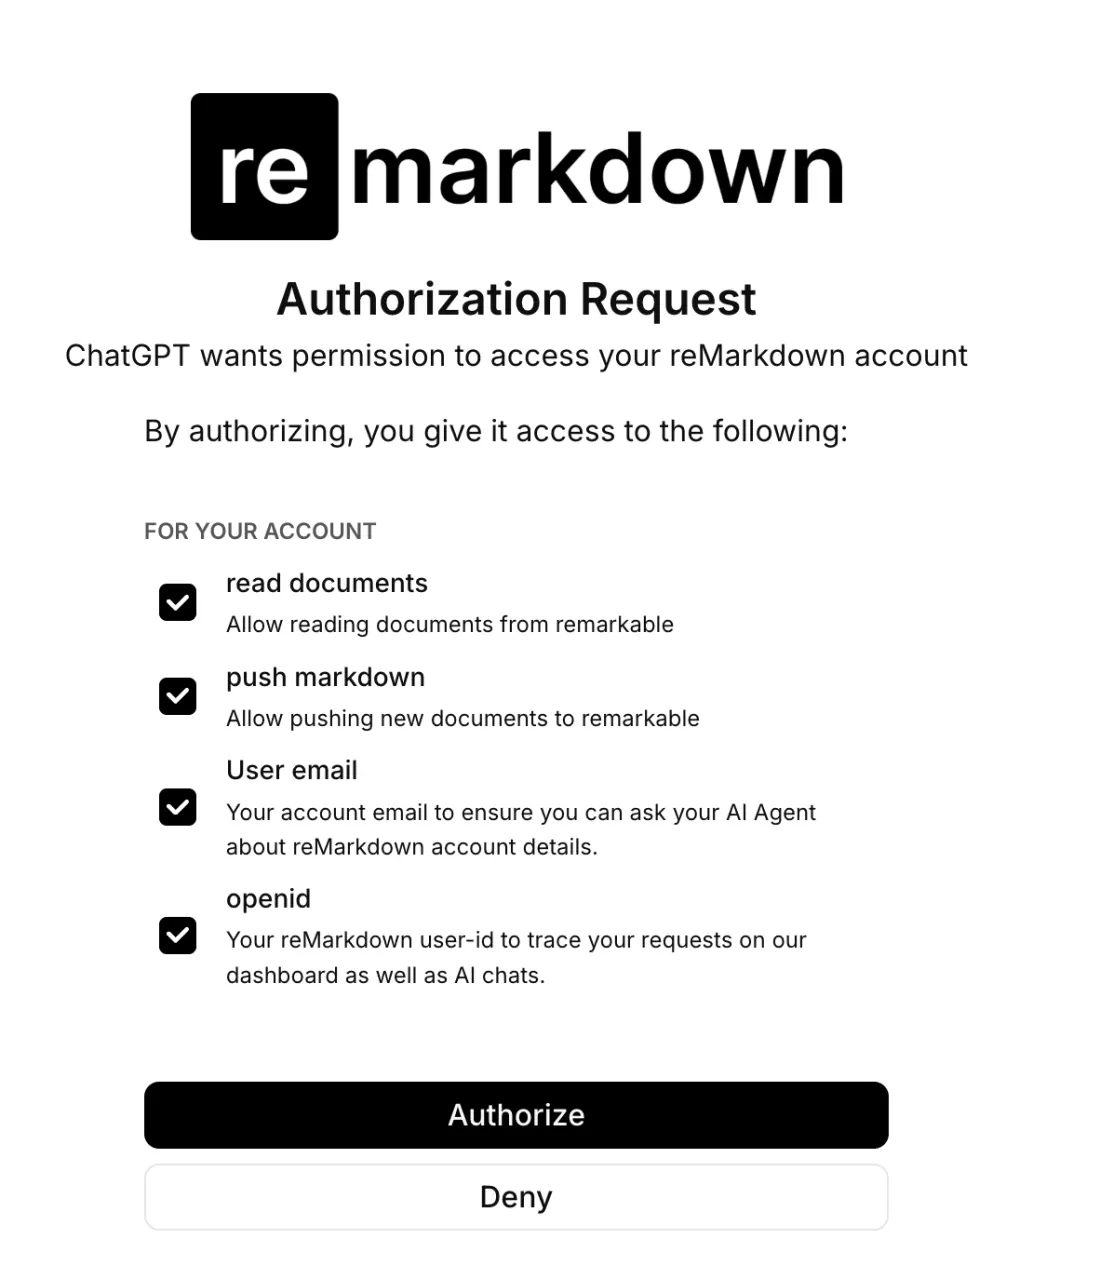
Authorize to grant access. -
Wait for the success screen — usually under a minute.
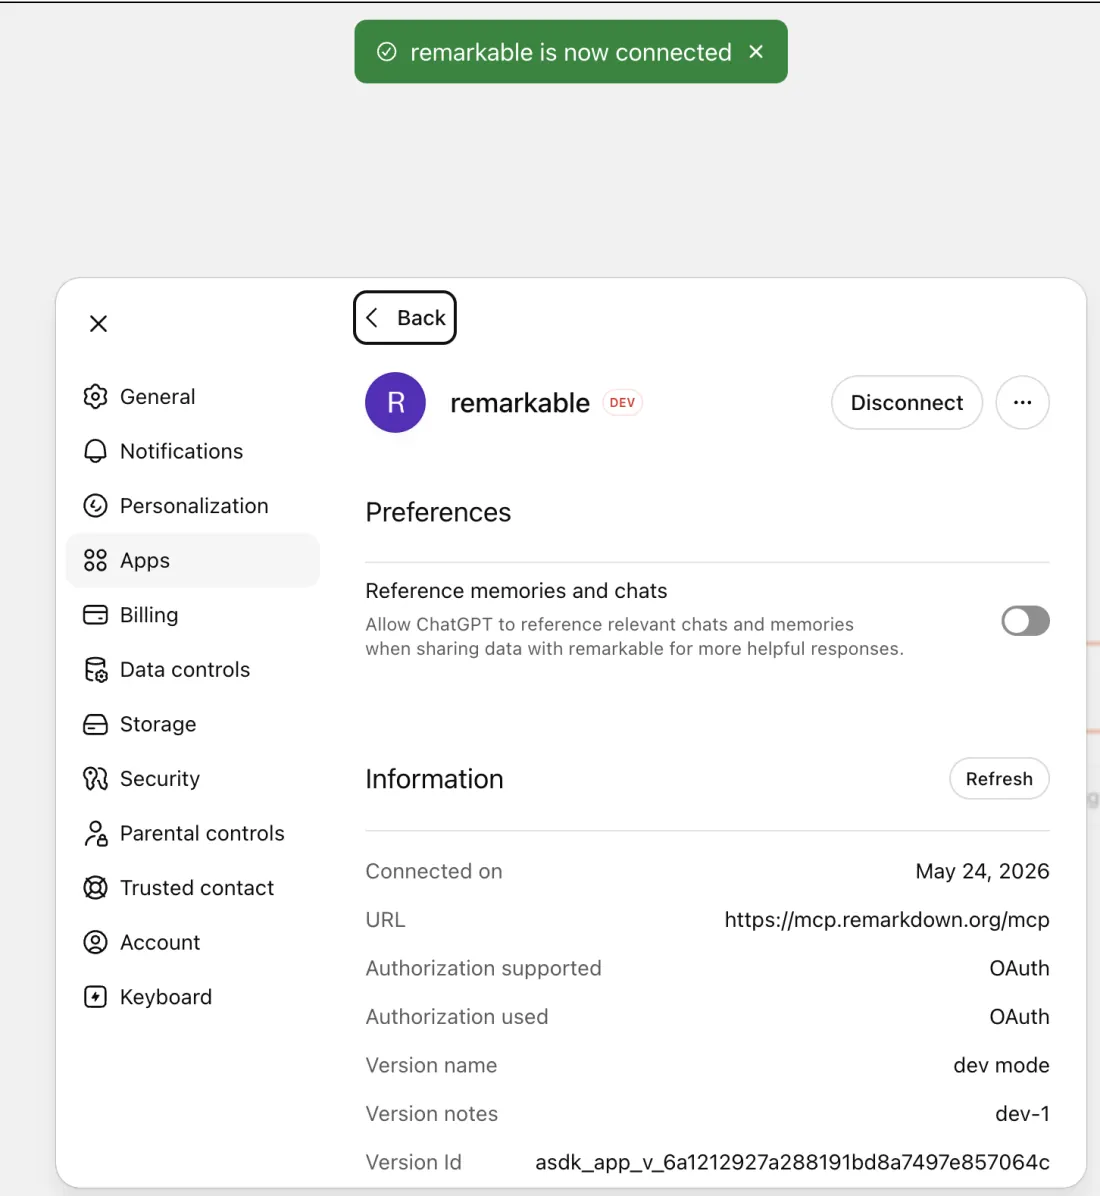
Done — remarkdown is connected.
Available in Developer mode on Plus, Pro, Business, Enterprise, and Edu plans.
Claude Desktop macOS & Windows · config file
Open Settings → Connectors → Add custom connector and paste this URL:
https://mcp.remarkdown.org/mcpOr edit the config file directly:
macOS ~/Library/Application Support/Claude/claude_desktop_config.json
Windows %APPDATA%\Claude\claude_desktop_config.json
{
"mcpServers": {
"remarkdown": {
"command": "npx",
"args": [
"-y",
"mcp-remote",
"https://mcp.remarkdown.org/mcp"
]
}
}
}Restart Claude Desktop. A browser window opens the first time to sign you in.
Claude Code CLI · one command
claude mcp add --transport http --scope user remarkdown https://mcp.remarkdown.org/mcpThen run /mcp inside Claude Code and pick remarkdown to authenticate. Drop --scope user if you only want it in this project.
Cursor Editor · mcp.json
Edit ~/.cursor/mcp.json (or the project's .cursor/mcp.json):
{
"mcpServers": {
"remarkdown": {
"url": "https://mcp.remarkdown.org/mcp"
}
}
}Open Settings → MCP & Integrations, toggle remarkdown on, and click Needs login.
Gemini CLI CLI · one command or settings.json
gemini mcp add --transport http remarkdown https://mcp.remarkdown.org/mcpOr edit ~/.gemini/settings.json:
{
"mcpServers": {
"remarkdown": {
"httpUrl": "https://mcp.remarkdown.org/mcp"
}
}
}Inside gemini, run /mcp auth remarkdown to complete sign-in.
Codex (OpenAI) Not supported yet · upstream OAuth bug in Codex
codex mcp login fails against remarkdown. The blocker is on Codex's side, and we can't work around it without breaking the MCP spec.
MCP's OAuth 2.1 profile requires clients to send an RFC 8707 resource parameter on the authorize request so the provider knows which MCP server is being authorized. Every other client on this page sends it. Codex doesn't, so our provider rejects the request:
invalid_request: Missing or invalid resourceTracked upstream:
When Codex ships the fix, point it at this URL:
https://mcp.remarkdown.org/mcpIn the meantime: any other client on this page works, or use the open-source remarkable_rust CLI as an alternative.
Custom provider Any other MCP client · raw endpoint URL
If your client supports an OAuth-protected HTTP MCP server, point it at this URL:
https://mcp.remarkdown.org/mcpAuthentication is OAuth 2.1 with Dynamic Client Registration; your client will be redirected here to sign in once. Transport is Streamable HTTP.